
How to Transfer Touch IC and Program True Tone Data to REPART 14 & 15 Soft OLED Screen

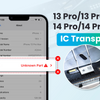
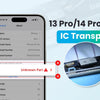
Transferring the touch IC is necessary when replacing an iPhone screen to remove the "unknown part" message and maintain the original display quality. It is particularly useful for refurbishing factories and pre-owned device sellers who require seamless replacements. We will guide you step-by-step on how to transfer the touch IC effectively for REPART iPhone 15 and 14.
Step 1: Program True Tone Data
Before transferring the touch IC, program the True Tone data into the new REPART screen using appropriate programming tools.

Step 2: Remove the Touch IC
Secure the Original Screen: Place the original screen into a screen fixture.

Apply Heat: Use a hot air gun (nozzle 1 cm away) to evenly heat the IC for 6-10 seconds.


Lift the IC: Use a pry knife to carefully flip up the IC.

Step 3: Prepare the IC Pads
Apply Flux: Spread flux over the IC pads to aid soldering.

Remove Old Solder: Apply a medium-temperature solder paste and use a soldering iron to melt the old solder.

Clean Up Solder Residue: Place a solder wick on the melted solder and press with a soldering iron to absorb the excess.

Clean the IC Pads: Use a brush dampened with isopropyl alcohol (IPA) to clean the pads.
Remove Adhesive Residue: Use a scraper to remove leftover adhesive, then clean again with a brush.


Step 4: Reball the IC
Prepare Solder Paste: Scoop out a small amount of medium-temperature solder paste. If too thin, place it on a lint-free cloth and knead to remove excess moisture.


Use a Stencil: Align the solder stencil with the IC pads.

Apply Solder Paste: Spread the paste evenly over the stencil using a spatula or scraper.

Heat to Form Solder Balls: Set the hot air gun to 280°C with airflow at 60 and heat until the solder paste melts into uniform balls.


Refine the Solder Balls: Remove the stencil and continue heating to ensure even formation.
Step 5: Solder the Tag-On Flex Cable
Fix the Tag-On Flex Cable: Secure it to a fixture.

Prepare the Pads: Apply flux to the pads and use a solder wick with a soldering iron to absorb old solder.


Clean the Pads: Use an IPA-dampened brush for cleaning.
Align the IC: Position the IC over the flex cable pads.
Step 6: Solder the Tag-On Flex Cable to the Screen

Apply Isopropyl Alcohol: Clean the screen flex cable area with IPA.

Insert a Metal Shim: Place a shim under the screen flex cable.

Attach the Tag-On Flex Cable: Peel off the release liner and align it properly.

Solder the Connections: Apply flux, then use a soldering iron to melt solder wire onto the pads, ensuring secure joints.
Refine Joints: Apply flux again and use tweezers with a soldering iron to smooth the solder points.

Final Cleaning: Wipe the solder pads with an IPA-dampened cotton ball.
Secure the Connection: Cover the soldered pads with black tape.

Cool and Clean: Let the IC area cool before cleaning the screen with a lint-free cloth.

Tools & Parts List
- Hot air gun
- Soldering iron
- Medium-temperature solder paste
- Flux
- Solder wick
- Pry knife
- Screen fixture
- Spatula or scraper
- Solder stencil
- Brush & IPA (isopropyl alcohol)
- Lint-free cloth
- Metal shim
- Tweezers
- Cotton ball
- Black tape
Conclusion
By carefully following this detailed guide, you can successfully transfer the touch IC to eliminate the "unknown part" warning while preserving True Tone functionality and the original display quality of REPART iPhone 15 and 14 screens. This process ensures seamless replacements for refurbishing factories and pre-owned device sellers and empowers technicians and DIY enthusiasts to achieve professional-grade repairs. Precision, patience, and the right tools are essential to avoid errors and maintain the integrity of the display. With these steps, you can deliver reliable, high-quality results that meet the demands of both consumers and repair professionals.
-
Posted in
iphone 14 screen, iphone 15 screen

