
Step-by-Step Guide to iPhone 14 Pro Screen Replacement
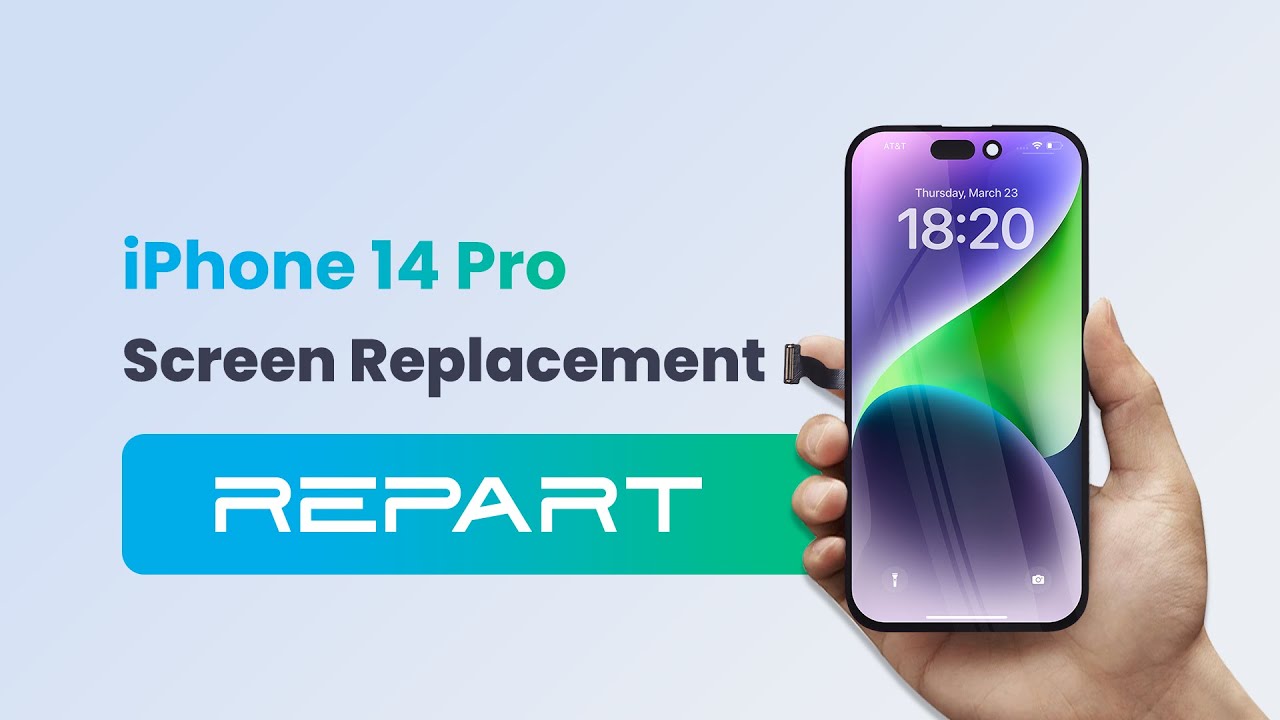
A cracked or unresponsive iPhone 14 Pro screen can feel like a major setback, but you don’t need to rush to an expensive repair shop. With the right tools, a replacement screen, and this step-by-step guide, you can perform an iPhone 14 Pro screen replacement at home or in your repair shop. Whether you’re a DIY enthusiast eager to save money or a technician looking to streamline your process, this tutorial will walk you through every detail—from removing the old screen to programming True Tone for a seamless repair. Let’s dive in and get your iPhone 14 Pro looking and functioning like new!
Why Replace Your iPhone 14 Pro Screen?
A damaged screen can impair touch functionality, display quality, or even the True Tone feature, which adjusts the screen’s color temperature for optimal viewing. This guide ensures you can restore all these functions while maintaining the iPhone’s sleek design.
Tools and Parts Needed
To replace your iPhone 14 Pro screen, gather the following:
- Pentalobe Screwdriver
- iPhone Separator
- Suction Cup
- Opening Pick
- Screen Holder
- Tweezers
- Spudger
- Cotton Swab
- Programmer
- REPART Screen Assembly for iPhone 14 Pro
- Replacement Adhesive
- Ethyl Alcohol
- Protection Stickers
- Front Sensor Bracket
Step 1: Prepare Your iPhone
Power Off the iPhone: Hold the side button and volume button, then slide to power off to prevent electrical damage.

Remove Pentalobe Screws: Use a Pentalobe screwdriver to unscrew the two screws at the bottom edge of the iPhone. Store them safely.

Verify True Tone: Before starting, confirm that the original screen’s True Tone is functional to transfer its data.

Step 2: Heat and Separate the Screen
Set Up the iPhone Separator: Place the iPhone face-up on the separator and set the heating temperature to 80°C (176°F) to soften the adhesive.

Secure the iPhone: Use the separator’s clamps and lower the suction cup onto the screen.


Heat the Adhesive: Start heating, then press down the suction cup and rotate the knob clockwise to lift the screen slightly, creating a gap.


Apply Ethyl Alcohol: Use a cotton swab to apply ethyl alcohol along the gap to further soften the adhesive.

Step 3: Open the iPhone
Insert an Opening Pick: Slide an opening pick into the gap under the screen’s plastic bezel and move it slowly along the edges to separate the adhesive, avoiding delicate cables near the top and sides.


Place on a Screen Holder: Position the iPhone in a screen holder to keep the screen stable, gently lifting it like opening a book.

Protect Front Cameras: Cover the front cameras with protection stickers to shield them from dust or damage.

Step 4: Disconnect Cables
Unscrew Connector Brackets: Use a screwdriver to remove the screws securing the display and antenna connector brackets.

Remove Brackets: Use tweezers to lift off both brackets.

Disconnect Cables: Use a spudger to gently disconnect the battery, display, and front sensor cables from the motherboard.

Step 5: Remove the Old Screen
Carefully lift the old screen assembly off the iPhone and set it aside.

Step 6: Program True Tone Data
Connect Original Screen: Attach the original screen to a programmer and read its True Tone data.

Connect REPART Screen: Connect the REPART screen to the programmer and write True Tone data to it.

Step 7: Transfer the Front Sensor
Unfasten Front Sensor Bracket: Unscrew and remove the front sensor bracket from the original screen.

Soften Adhesive: Apply ethyl alcohol to loosen the adhesive holding the proximity and ambient light sensors.

Remove Sensors: Use tweezers to gently lift the proximity and ambient light sensors from their notches, then peel off the front sensor assembly.


Install Sensors on New Screen: Align the proximity and ambient light sensors into the notches on the REPART screen and press gently to secure.

Reattach Bracket: Align the front sensor bracket with the screw hole and fasten it.

Step 8: Clean and Apply New Adhesive
Remove Old Adhesive: Use tweezers and a cotton swab with ethyl alcohol to clean old adhesive from the iPhone’s frame.

Apply Replacement Adhesive: Peel off the large backing of the replacement adhesive, align it with the iPhone’s frame, and press down on the edges.

Remove Liners: Use tweezers to peel off the large front liner and the final release liner from the adhesive.

Step 9: Reconnect and Test
Reconnect Cables: Connect the display, front sensor, and battery cables to the motherboard.

Power On and Test: Turn on the iPhone to verify True Tone and touch functionality.

Power Off: If everything works, power off the iPhone.
Step 10: Install the New Screen
Remove Protection Film: Peel off the protective film from the back of the REPART screen.

Reinstall Brackets: Attach the antenna and display connector brackets, then fasten them with screws.

Remove Camera Stickers: Take off the front camera protection stickers.

Align and Secure Screen: Align the screen’s edges with the iPhone’s body and apply gentle pressure to close it, ensuring the adhesive bonds evenly.

Tighten Pentalobe Screws: Reinstall the two Pentalobe screws at the bottom edge.

Step 11: Final Verification
Power on the iPhone and confirm that the display, touch functionality, and True Tone are working perfectly.

Conclusion
Congratulations! You've successfully completed an iPhone 14 Pro screen replacement! By following this guide, you’ve restored your device’s display, touch functionality, and True Tone feature, all while saving time and money. Whether you’re a DIY enthusiast or a professional technician, this process empowers you to tackle iPhone repairs with confidence. Ready to take on your next repair project? Grab your tools and keep exploring the world of tech fixes!
-
Posted in
iphone 14 pro, screen replacement

